


I've previously played with using my scanner to produce images. Now had a more serious attempt - but still 'playing' as not tried various tweaks (not that I yet know what they are!)
Here is the image, followed by some technical info:
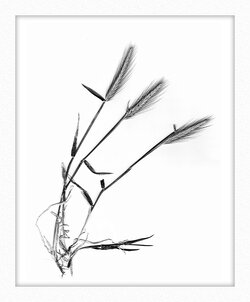
- Scanner - bog standard printer/scanner, XP 820, several years old
- Scanner type - this is a cis scanner ie not a ccd one. This means that it has a very narrow depth of field (mms). You can be more flexible in what you photograph with a ccd scanner
- Preparation - cleaned scanner glass (but not the white inside of the lid; I should have done that to save removing marks in PS)
- Used 'Preview' to check composition
- Pressed lid down to help make subject flatter (not sure if this helped or not)
- Scanned at 600 dpi in colour. The scan took about two mins.
- Post-processing entirely in PS
if you have ccd scanner you might find this video of interest, but it is now some 5 years old and so (eg) the processing advice may be out of date:
Here is the image, followed by some technical info:
- Scanner - bog standard printer/scanner, XP 820, several years old
- Scanner type - this is a cis scanner ie not a ccd one. This means that it has a very narrow depth of field (mms). You can be more flexible in what you photograph with a ccd scanner
- Preparation - cleaned scanner glass (but not the white inside of the lid; I should have done that to save removing marks in PS)
- Used 'Preview' to check composition
- Pressed lid down to help make subject flatter (not sure if this helped or not)
- Scanned at 600 dpi in colour. The scan took about two mins.
- Post-processing entirely in PS
if you have ccd scanner you might find this video of interest, but it is now some 5 years old and so (eg) the processing advice may be out of date: